Smartphone Editing: 5 Tips for Smartphone Photo Editing
Before the days of smartphones, taking a great quality photo was a labor-intensive process. You’d have to buy a fancy camera and editing software to edit your photo on your desktop computers. You also had to invest some serious time and energy to learn how to use them.
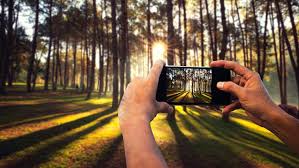
These days, smartphones are so powerful device. They work almost as well as regular computers in some aspects. A lot of photographers now even rely on mobile apps to help them capture the perfect shot.
5 Tips for Smartphone Photo Editing
1. Connect Your Camera to Your Phone
If you want more professional-looking results, you can also hook up your camera to your mobile phone wirelessly. This is arguably among a few smartphone photographs that people would have considered impossible just a few years ago. But now, everyone can try it.
2. Try Using RAW
Shooting in RAW is arguably among the most crucial photo editing tips you encounter all the time. Unlike JPEG, this format retains all the visual information you’ll need when making changes to your photo.
3. Back-Up Your Photos
You need to make sure that you always back up your images. Backing-up your images should always be standard procedures.
If you’re using an iPhone, go to Settings, scroll down and tap iCloud. Once you see a list come up, look for Photos and make sure it’s turned on. Doing so ensures that your phone automatically transfers the files to your online storage.
And if you’re using Android, you can transfer your files using Google Photos. Once the gallery loads, tap the icon with three dots found on the upper left-hand corner of the screen and select Settings. Then, scroll down and turn on the folders that you’d like to copy. When you’re done, click on Backup & Sync and turn it on.
4. Save Your Edits Separately
After you edit your images, don’t delete your original file. When you keep the unedited version, you can rework it anytime you want to change how it looks.
To avoid the confusion, organize your images into folders. Collect the unedited files into one group and place the edited ones into another. It helps you to avoid any confusion especially if you have hundreds or even thousands of photos to choose from.
5. Don’t Overdo It
It’s true that the higher resolution of today’s phones significantly improves the quality of your image. Nevertheless, your device’s sensor is still considerably smaller than a compact digital camera.
Consequently, you can only alter so much of a smartphone image before the quality starts to disintegrate. For instance, whenever you crop an image to fix lousy composition, you make it smaller and reduce its quality significantly. The same is true when it comes to exposure.
If your photo is too dark or too bright, you might lose details when you change it. So whenever you’re editing, just do subtle adjustments to your picture.
That it’s for today, hope it may help you edit your images using a smartphone. Follow this blog for many sharing like this.
Great tips for edit photo in smartphone. Thanks
Most Welcome Sir,
We hope it helps you to design a wonderful design just using a smartphone 🙂